How do I change the pile height on my KRD-I Cut-and-Loop-Pile Tufting Machine?Updated 4 years ago
KRD-I Cut-and-Loop-Pile Tufting Machine
To adjust the pile height on your KRD-I machine, you’ll need:
An adjustable wrench
The Allen wrenches that came with your machine
A ruler or calipers
The primary indicator of the length of the pile height is the part of your machine called the upper machine bar. Shortening the length of the upper machine bar will result in a longer pile, equivalent to the length you shorten the bar. Extending the length of the upper machine bar will result in a shorter pile (equivalent to the length you extend the bar).
There’s often variation in the KRD’s out-of-the-box factory setting. Therefore, in order to play with either shortening or lengthening pile height, we recommend adjusting the upper machine bar approximately 2 mm at a time, testing the new pile, and readjusting as necessary.
*Please note that it’s not necessary or recommended that you adjust the lower machine bar. 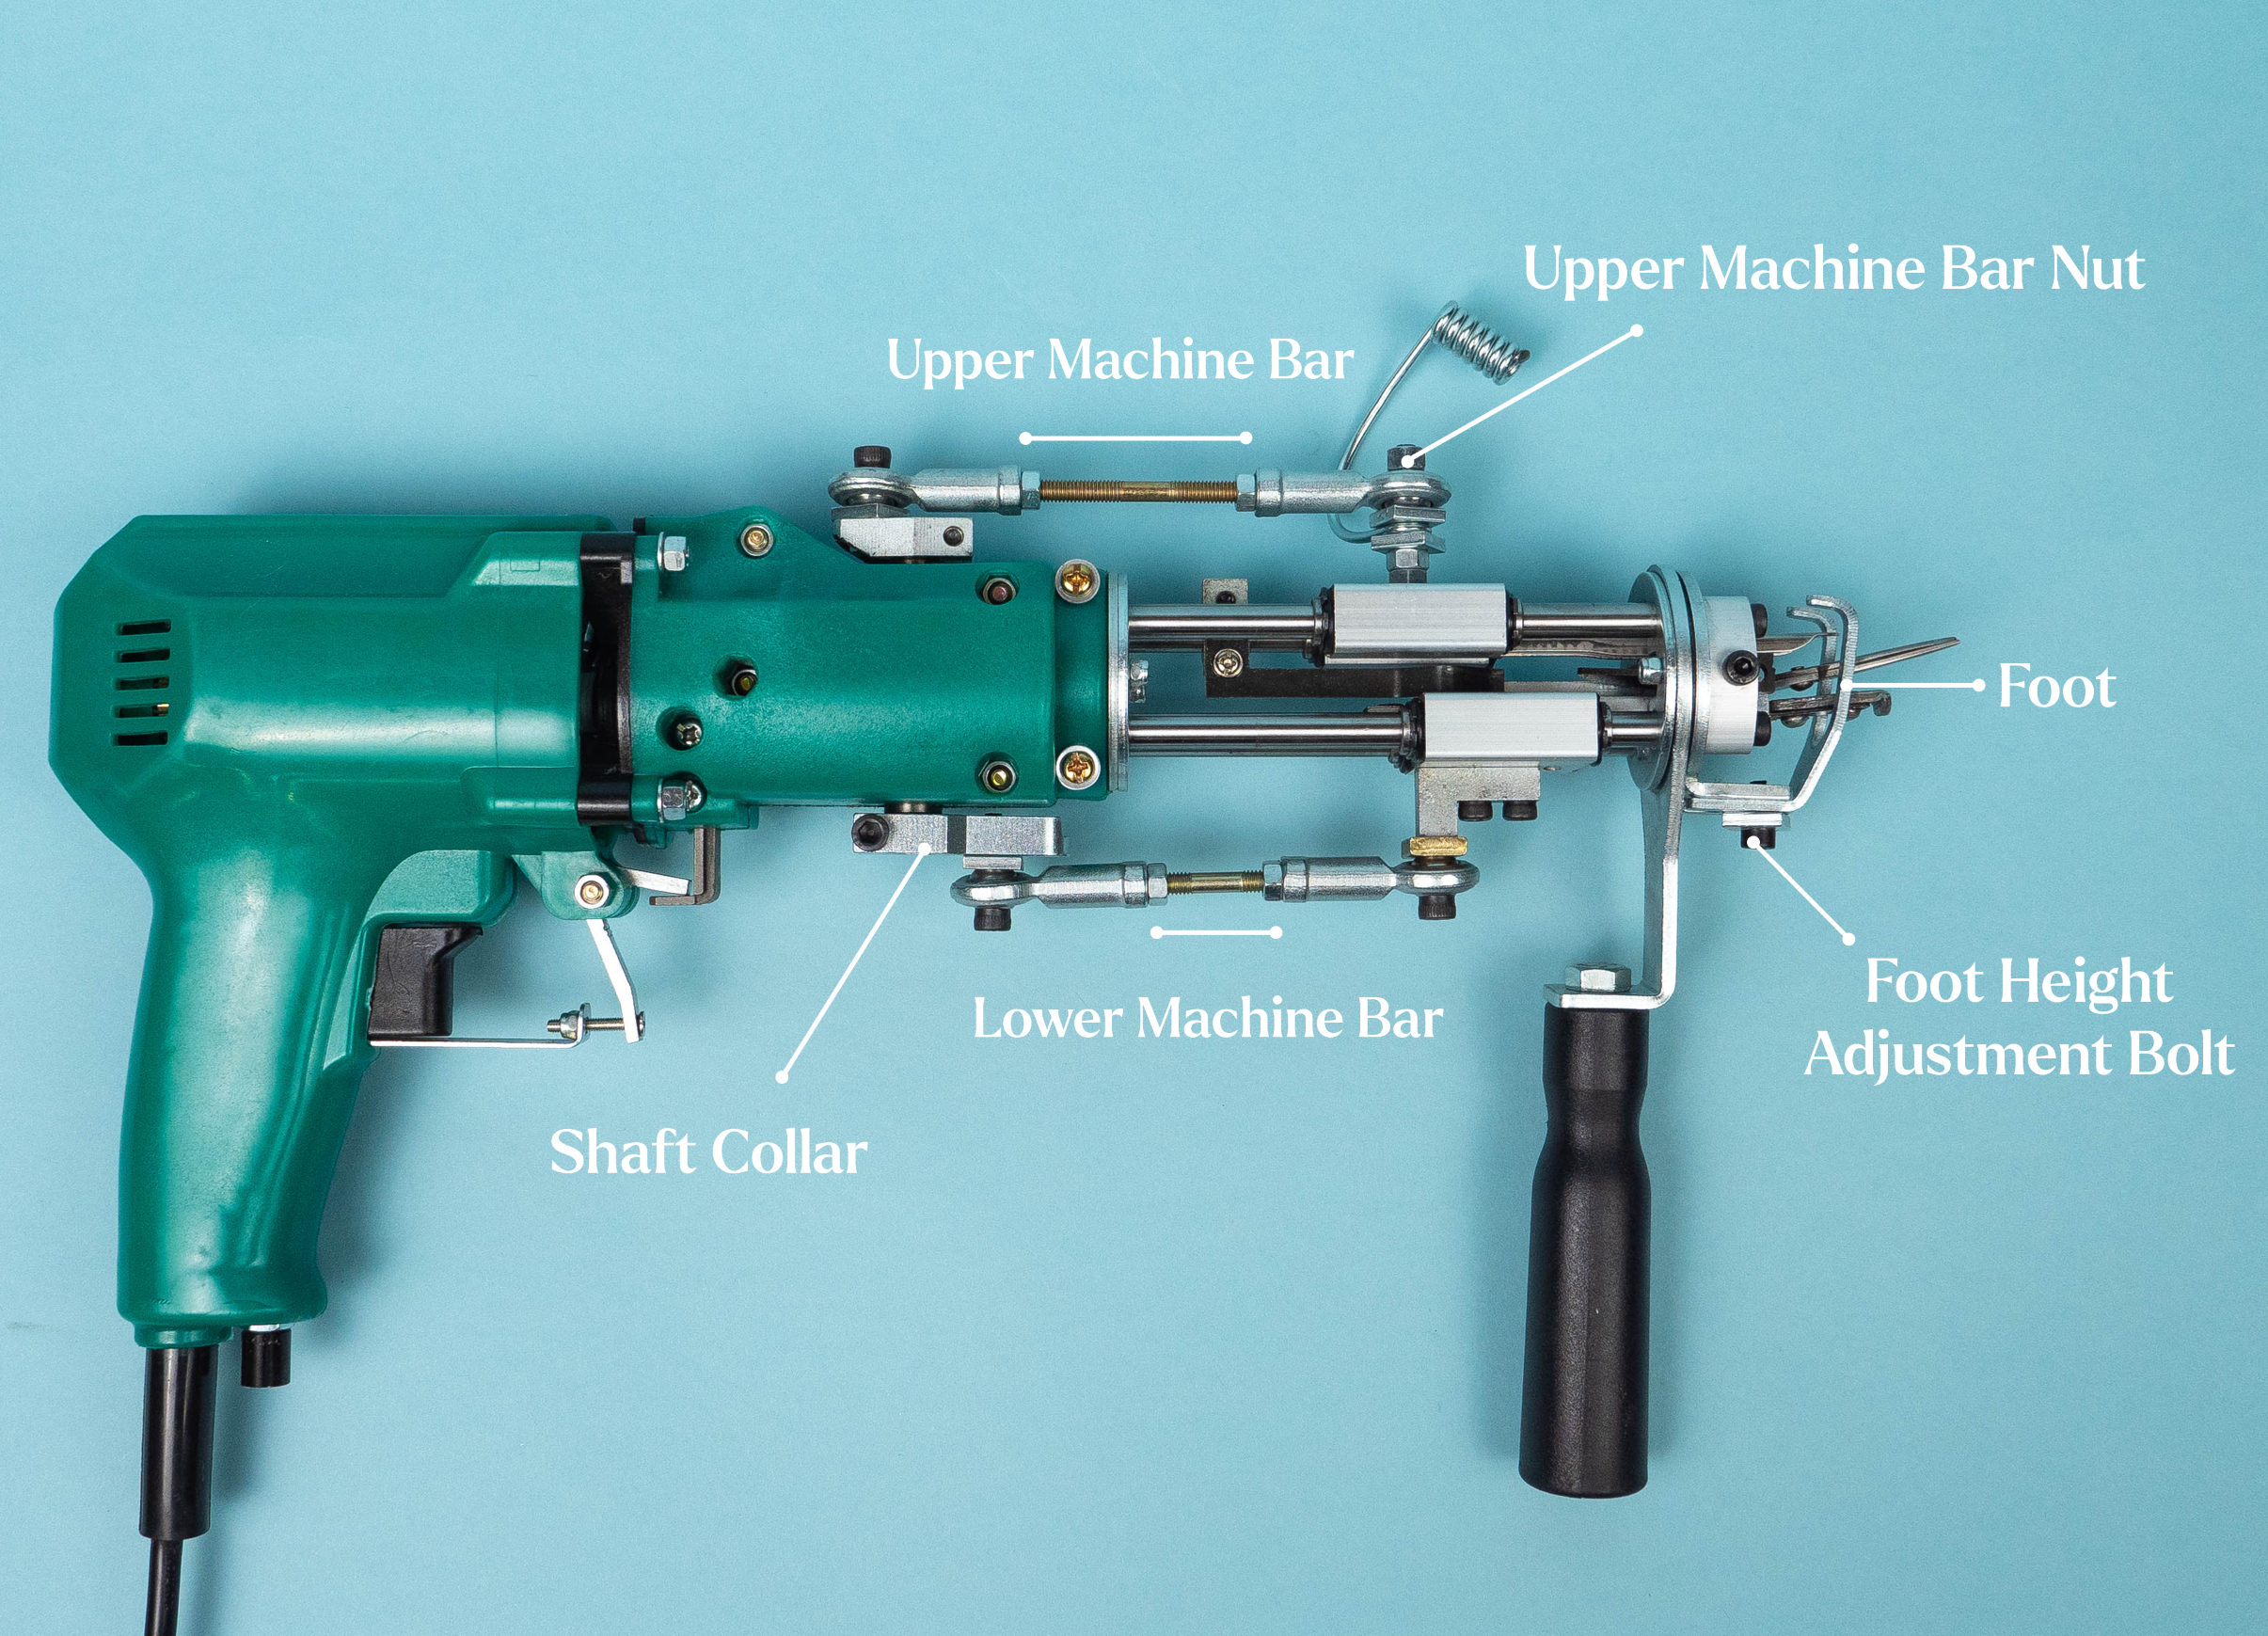
Before you get started: Make sure your machine is UNPLUGGED. Using a ruler or calipers, measure the exact length of both the upper and lower machine bars (between the nuts) before any adjustments. Keep these measurements for your records, since they indicate the factory setting of your machine, should you need to return your machine to its original settings.
Step 1: With the trigger depressed, manually rotate the bottom shaft collar several times to ensure that the scissors open and close smoothly. Check to make sure that the lower machine bar is firmly attached to the shaft collar, that the bolts attaching the lower machine bar to the body of the machine are tight, and that the nuts at the ends of the lower machine bar are tight. Note that the lower machine bar will not change during adjustment.
Step 2: Using your adjustable wrench, remove the upper machine bar nut so that the upper machine bar can swing free of its front post. If you’re unable to free the upper machine bar at the front, loosen the back bolt to allow some give, but then be sure to tighten this back post again (the back of the upper machine bar should stay anchored to the machine body during adjustment).
Step 3: With the upper machine bar loose, twist the metal bearing at the front end of the bar two twists (approx. 2 mm), to either extend or shorten the upper machine bar. Extending the bar 2 mm will cause your pile to shorten by 2 mm. Shortening the bar 2 mm will cause your pile to be 2 mm taller. We recommend only adjusting the upper machine bar in 2 mm increments at a time, then following steps 3 - 5 and testing the shaft collar rotation before use, so as not to damage your machine.
Step 4: Once the upper machine bar reaches the length you want, reattach the front of the upper machine bar to its post, and reattach the upper machine bar bolt using your adjustable wrench. Check that the upper machine bar nuts are also tightened. Test your machine by manually rotating the shaft collar.
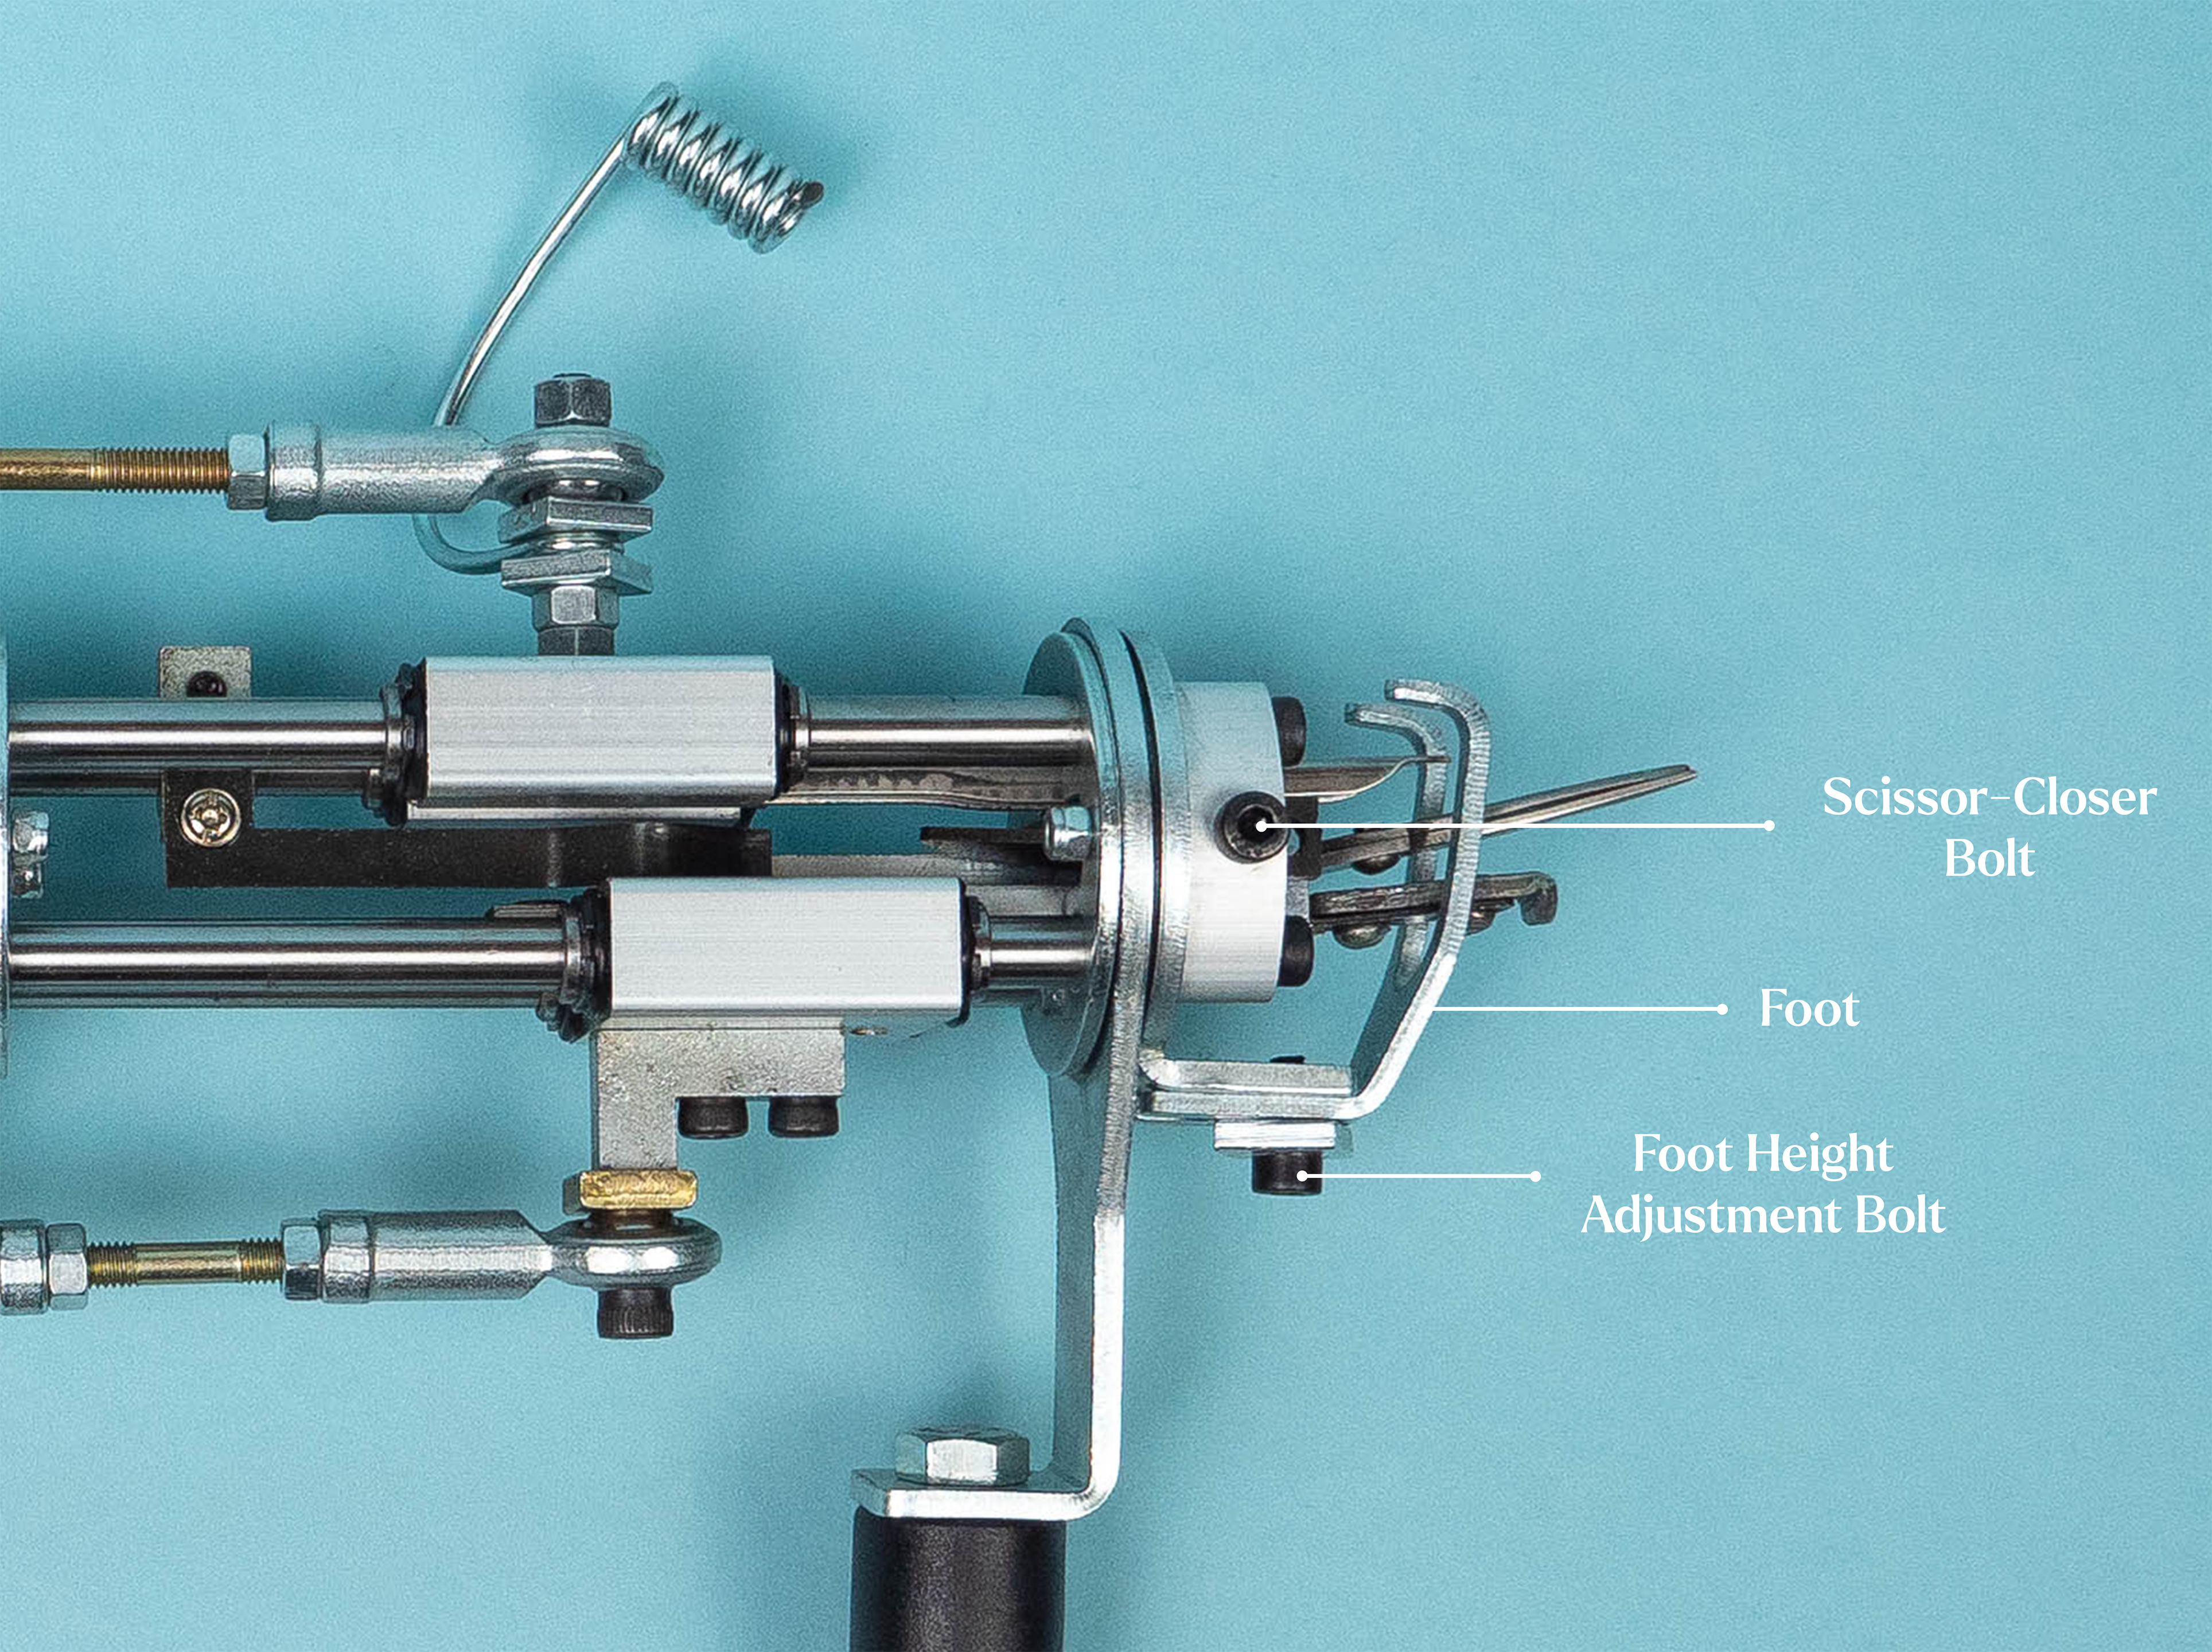
Step 5: Use an Allen wrench to loosen the foot height adjustment bolt, located on the underside of the foot. Adjust the foot by sliding the foot height adjustment bolt along its slot until it’s roughly lined up with the back edge of the needle hole. Before you tighten the foot back in place, make sure the needle is centered inside the foot.
Step 6: Again, manually rotate the shaft collar to ensure that the scissors open and close smoothly. If the scissors aren’t fully closing, you’ll need to make one more adjustment. Use the smallest Allen wrench provided to loosen the scissor-closer bolt, which is attached to an adjustable slotted piece called the scissor-closer. Loosen the bolt, then make micro-adjustments to the position of the scissor-closer. The scissor-closer is in the correct position when you can fit your Allen wrench fully in the slot of the scissor-closer without excess space in the slot. When the scissor-closer is in the correct position, remove the Allen wrench and tighten the bolt.
Finally, check the shaft collar again for several smooth rotations (and no loose bolts!) before you plug your machine in!
We are currently working on a video to demonstrate this adjustment. Please check back soon!