How do I change the pile height on my AK-I Cut-pile Tufting Machine?Updated 4 years ago
AK-I Cut-pile Tufting Machine
To adjust the pile height on your cut-pile machine, you’ll need:
- An adjustable wrench
- The Allen wrenches that came with your machine
- A ruler or calipers
The primary indicator of the length of the pile height is the part of your machine called the upper machine bar. Shortening the length of the upper machine bar will cause your machine to tuft a longer pile. Extending the length of the upper machine bar will cause your machine to tuft a shorter pile.
The general pile range for the AK-I is:
- Tallest pile* = Upper machine bar measures 55 mm (2 ⅛ in)
- Lowest pile = Upper machine bar measures 60 mm (approx. 2 ⅜ in)
- Both pile heights = Lower machine bar measures 45mm (approx. 1 ¾ in)
*This is also the FACTORY SETTING. We do not recommend shortening the upper machine bar beyond the factory setting, as it risks damaging the machine.
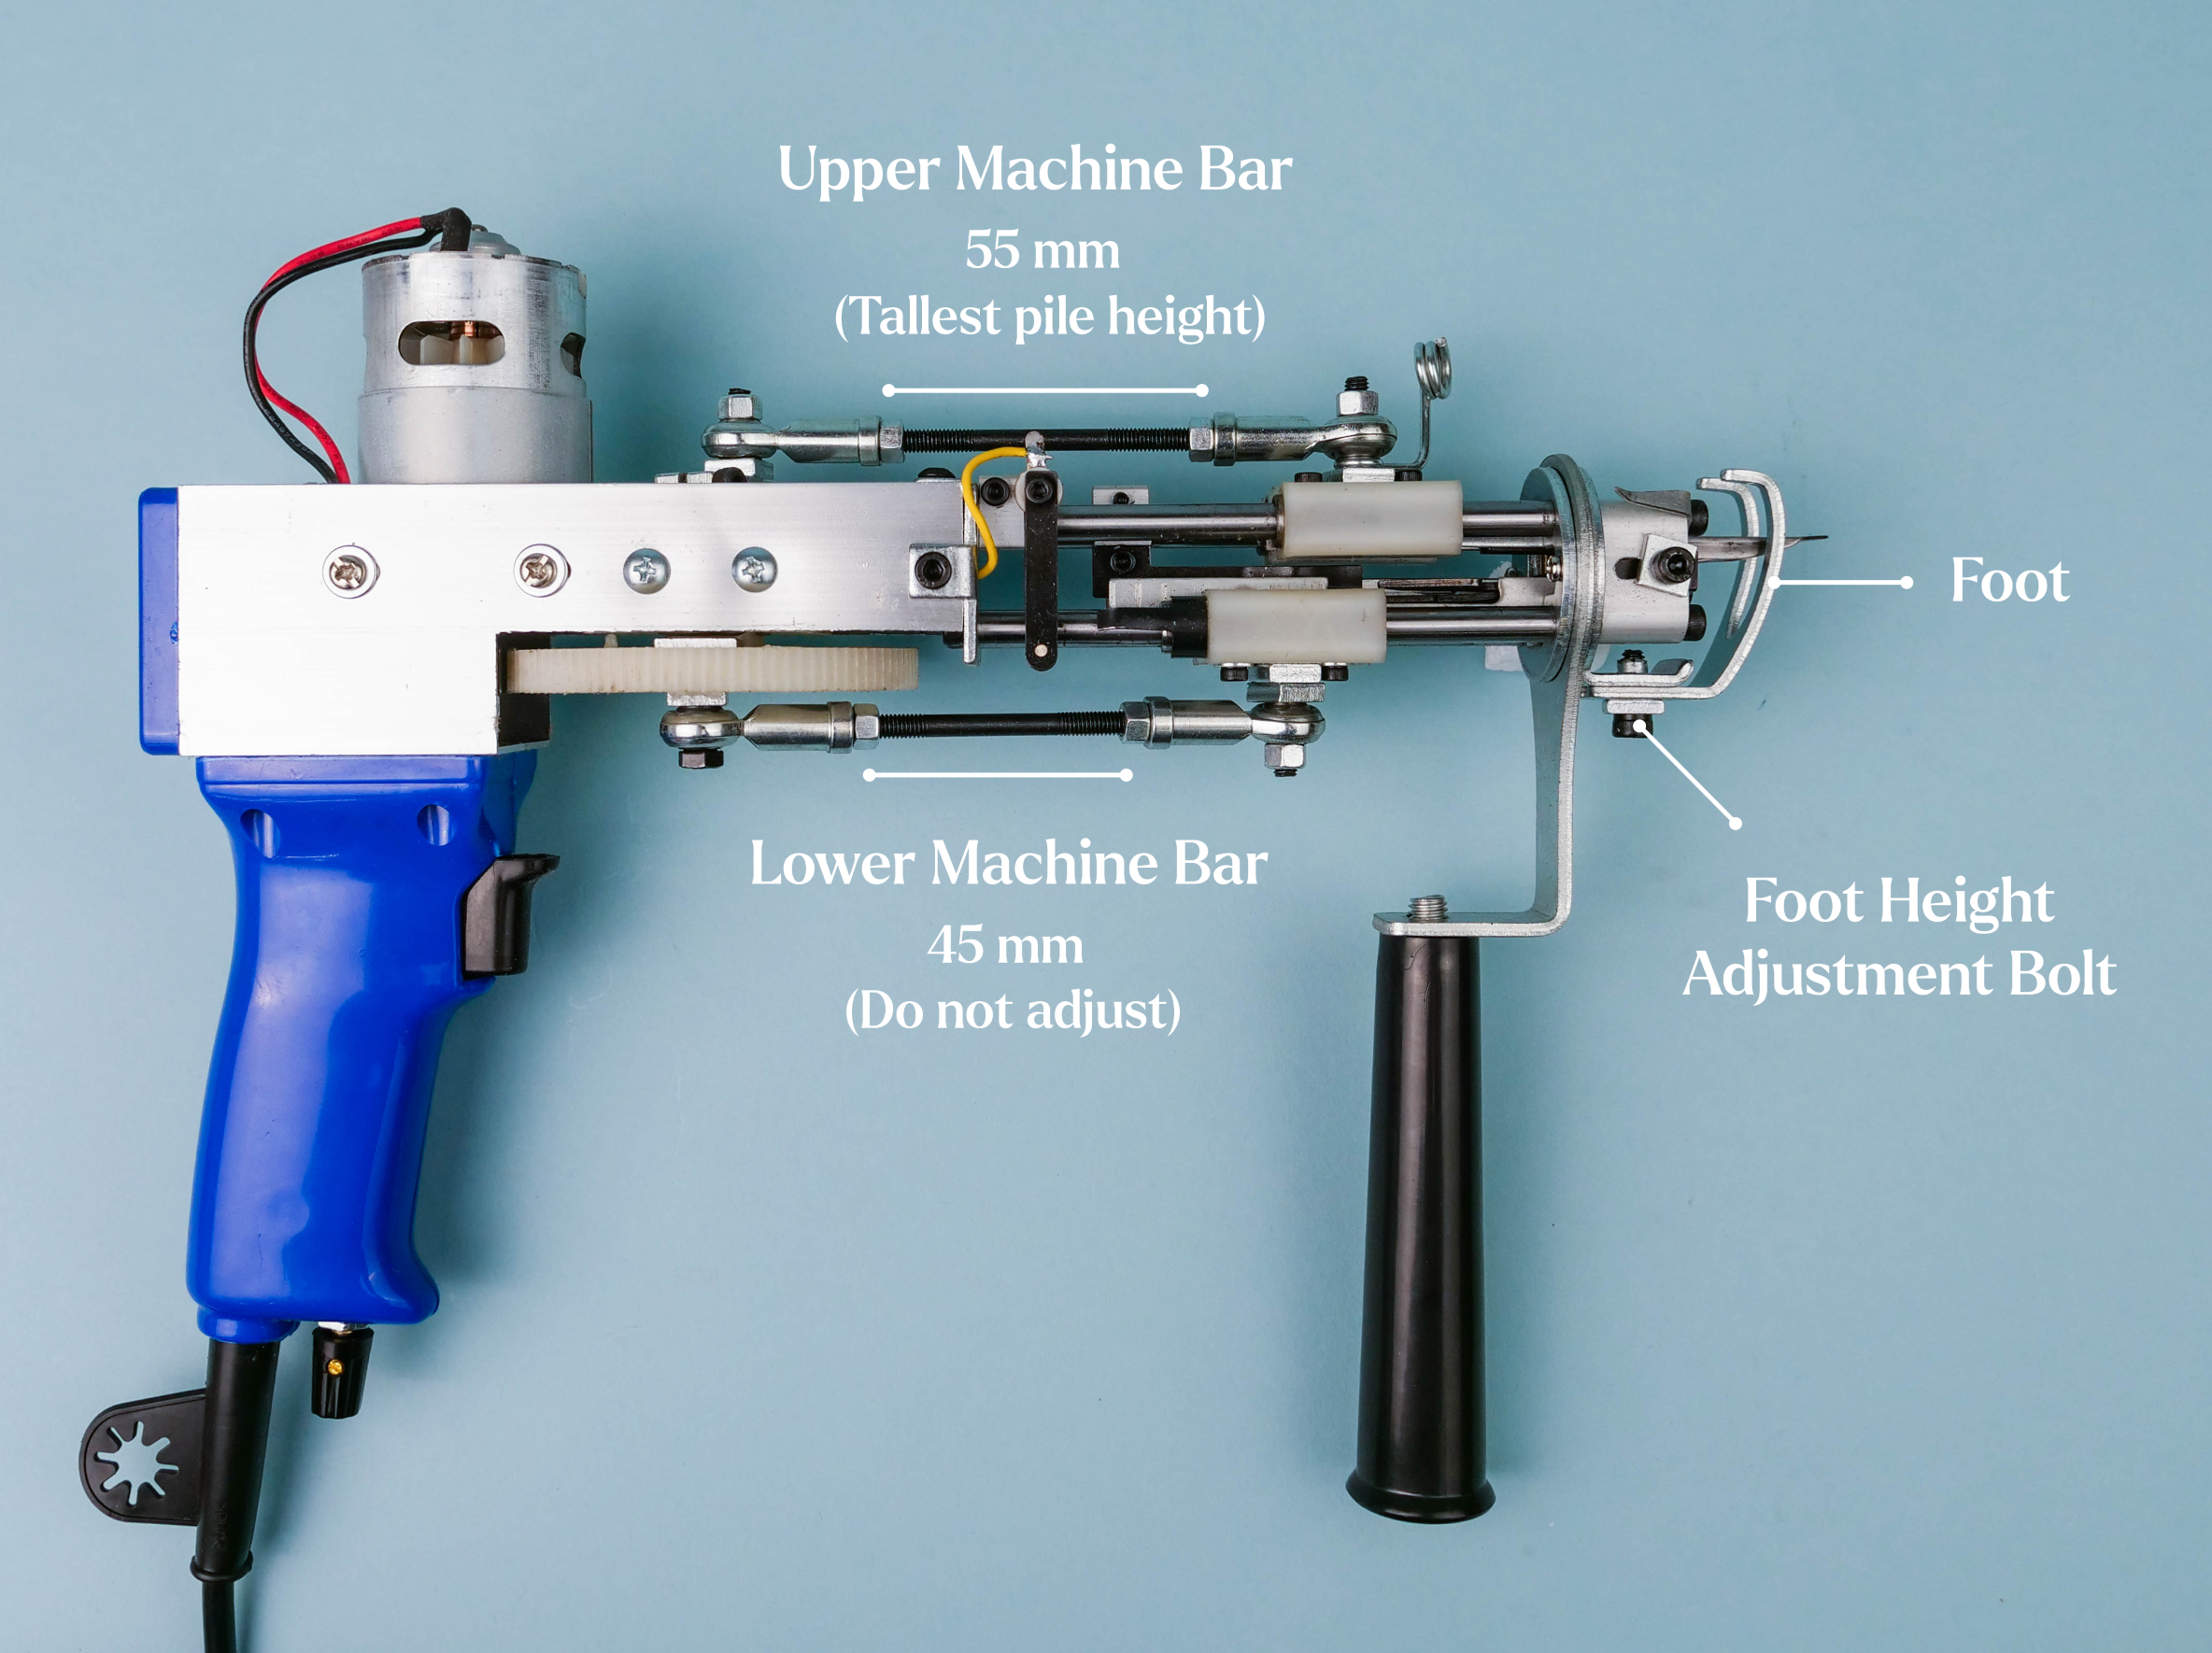
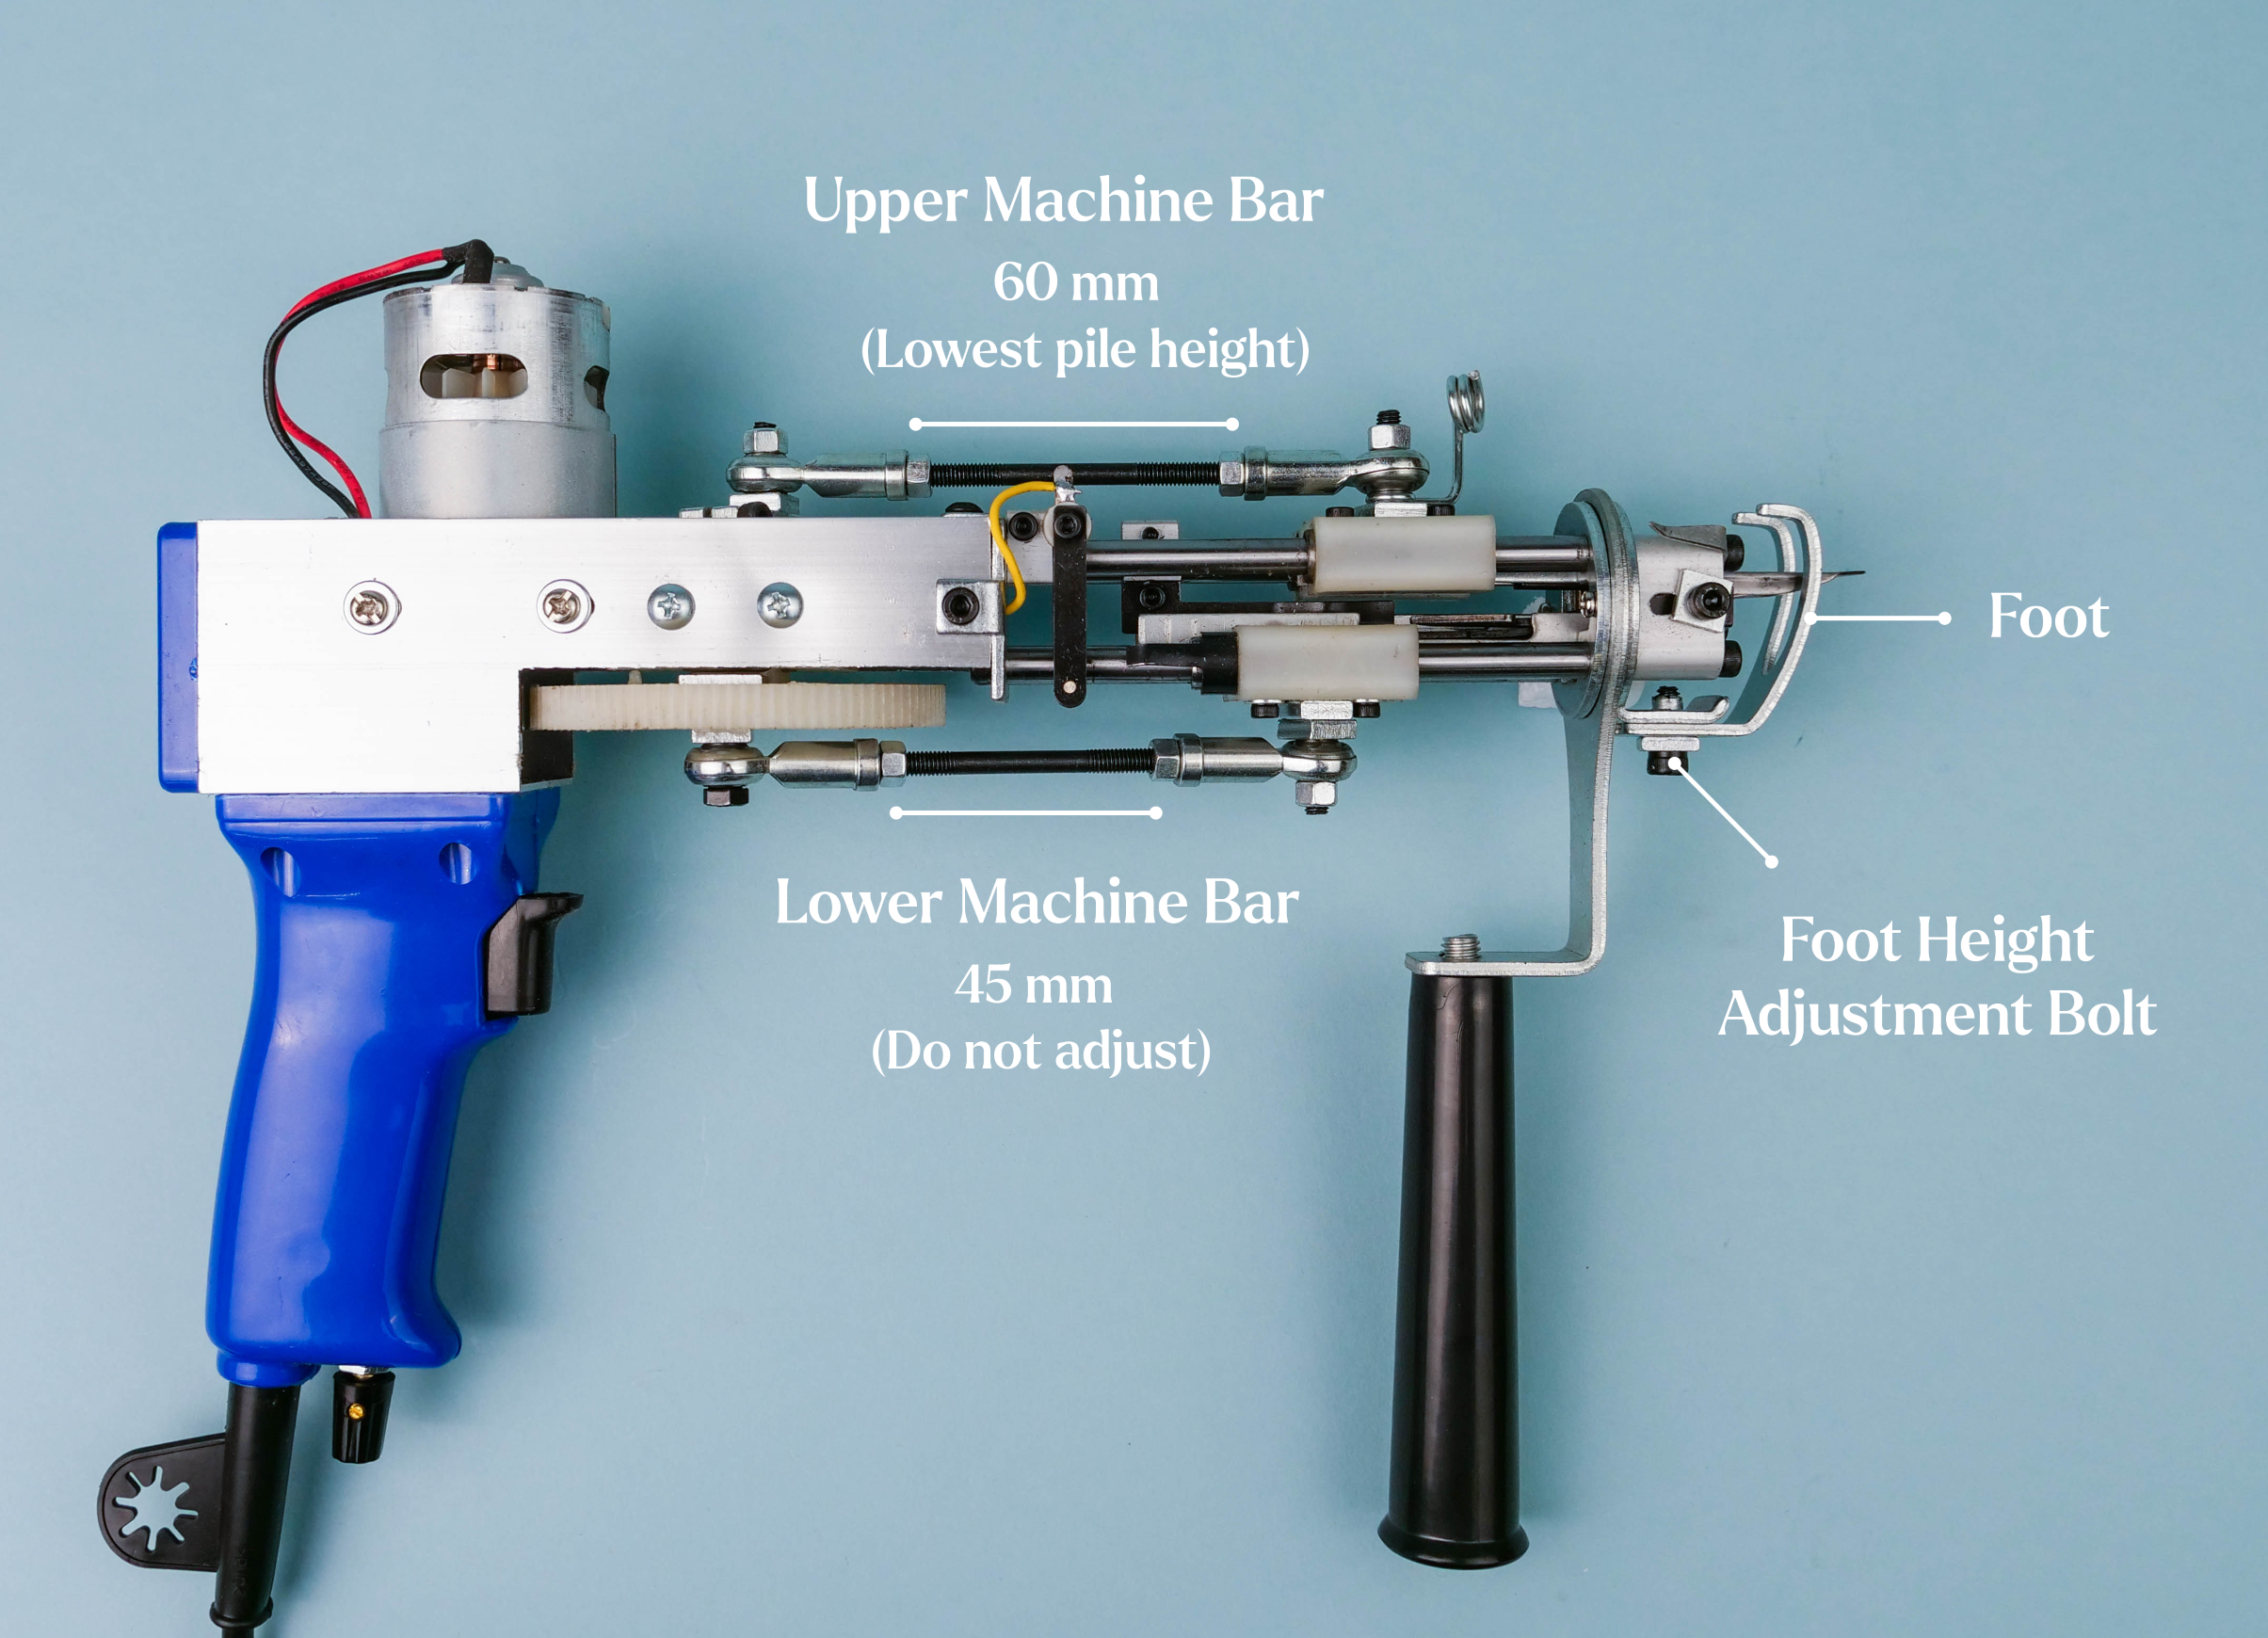
Depending on the degree of the adjustment, you may also need to recalibrate the positions of several other parts of your machine, including the foot height (adjustable by the foot height adjustment bolt) and the scissor closing part.
Check out this helpful video, or follow the step-by-step instructions below. Incorrect adjustments can damage your machine.
Before you get started: Manually rotate the large white gear several times to ensure that the scissors open and close smoothly, and check to make sure that the lower machine bar is firmly attached to the center most part of the white gear. Note that the lower machine bar will not change during adjustments. (Video: 0 - 5:00 minutes)
Step 1: Loosen the nuts on either end of the upper machine bar with a wrench. Once the nuts are loose, loosen the bolt that attaches the upper machine bar to the body of the machine near the yarn guide hole until the bar swings freely. Now, twist the metal bearing at the end of the bar until the upper machine bar reaches the desired length. (Video: 5:00 - 7:45 mins.)
Step 2: Once the upper machine bar reaches the length you want, use the wrench to tighten the bolts back in place. Test your machine by manually rotating the white gear. Check that nothing is loose. (Video: 7:45 - 8:50 mins.)
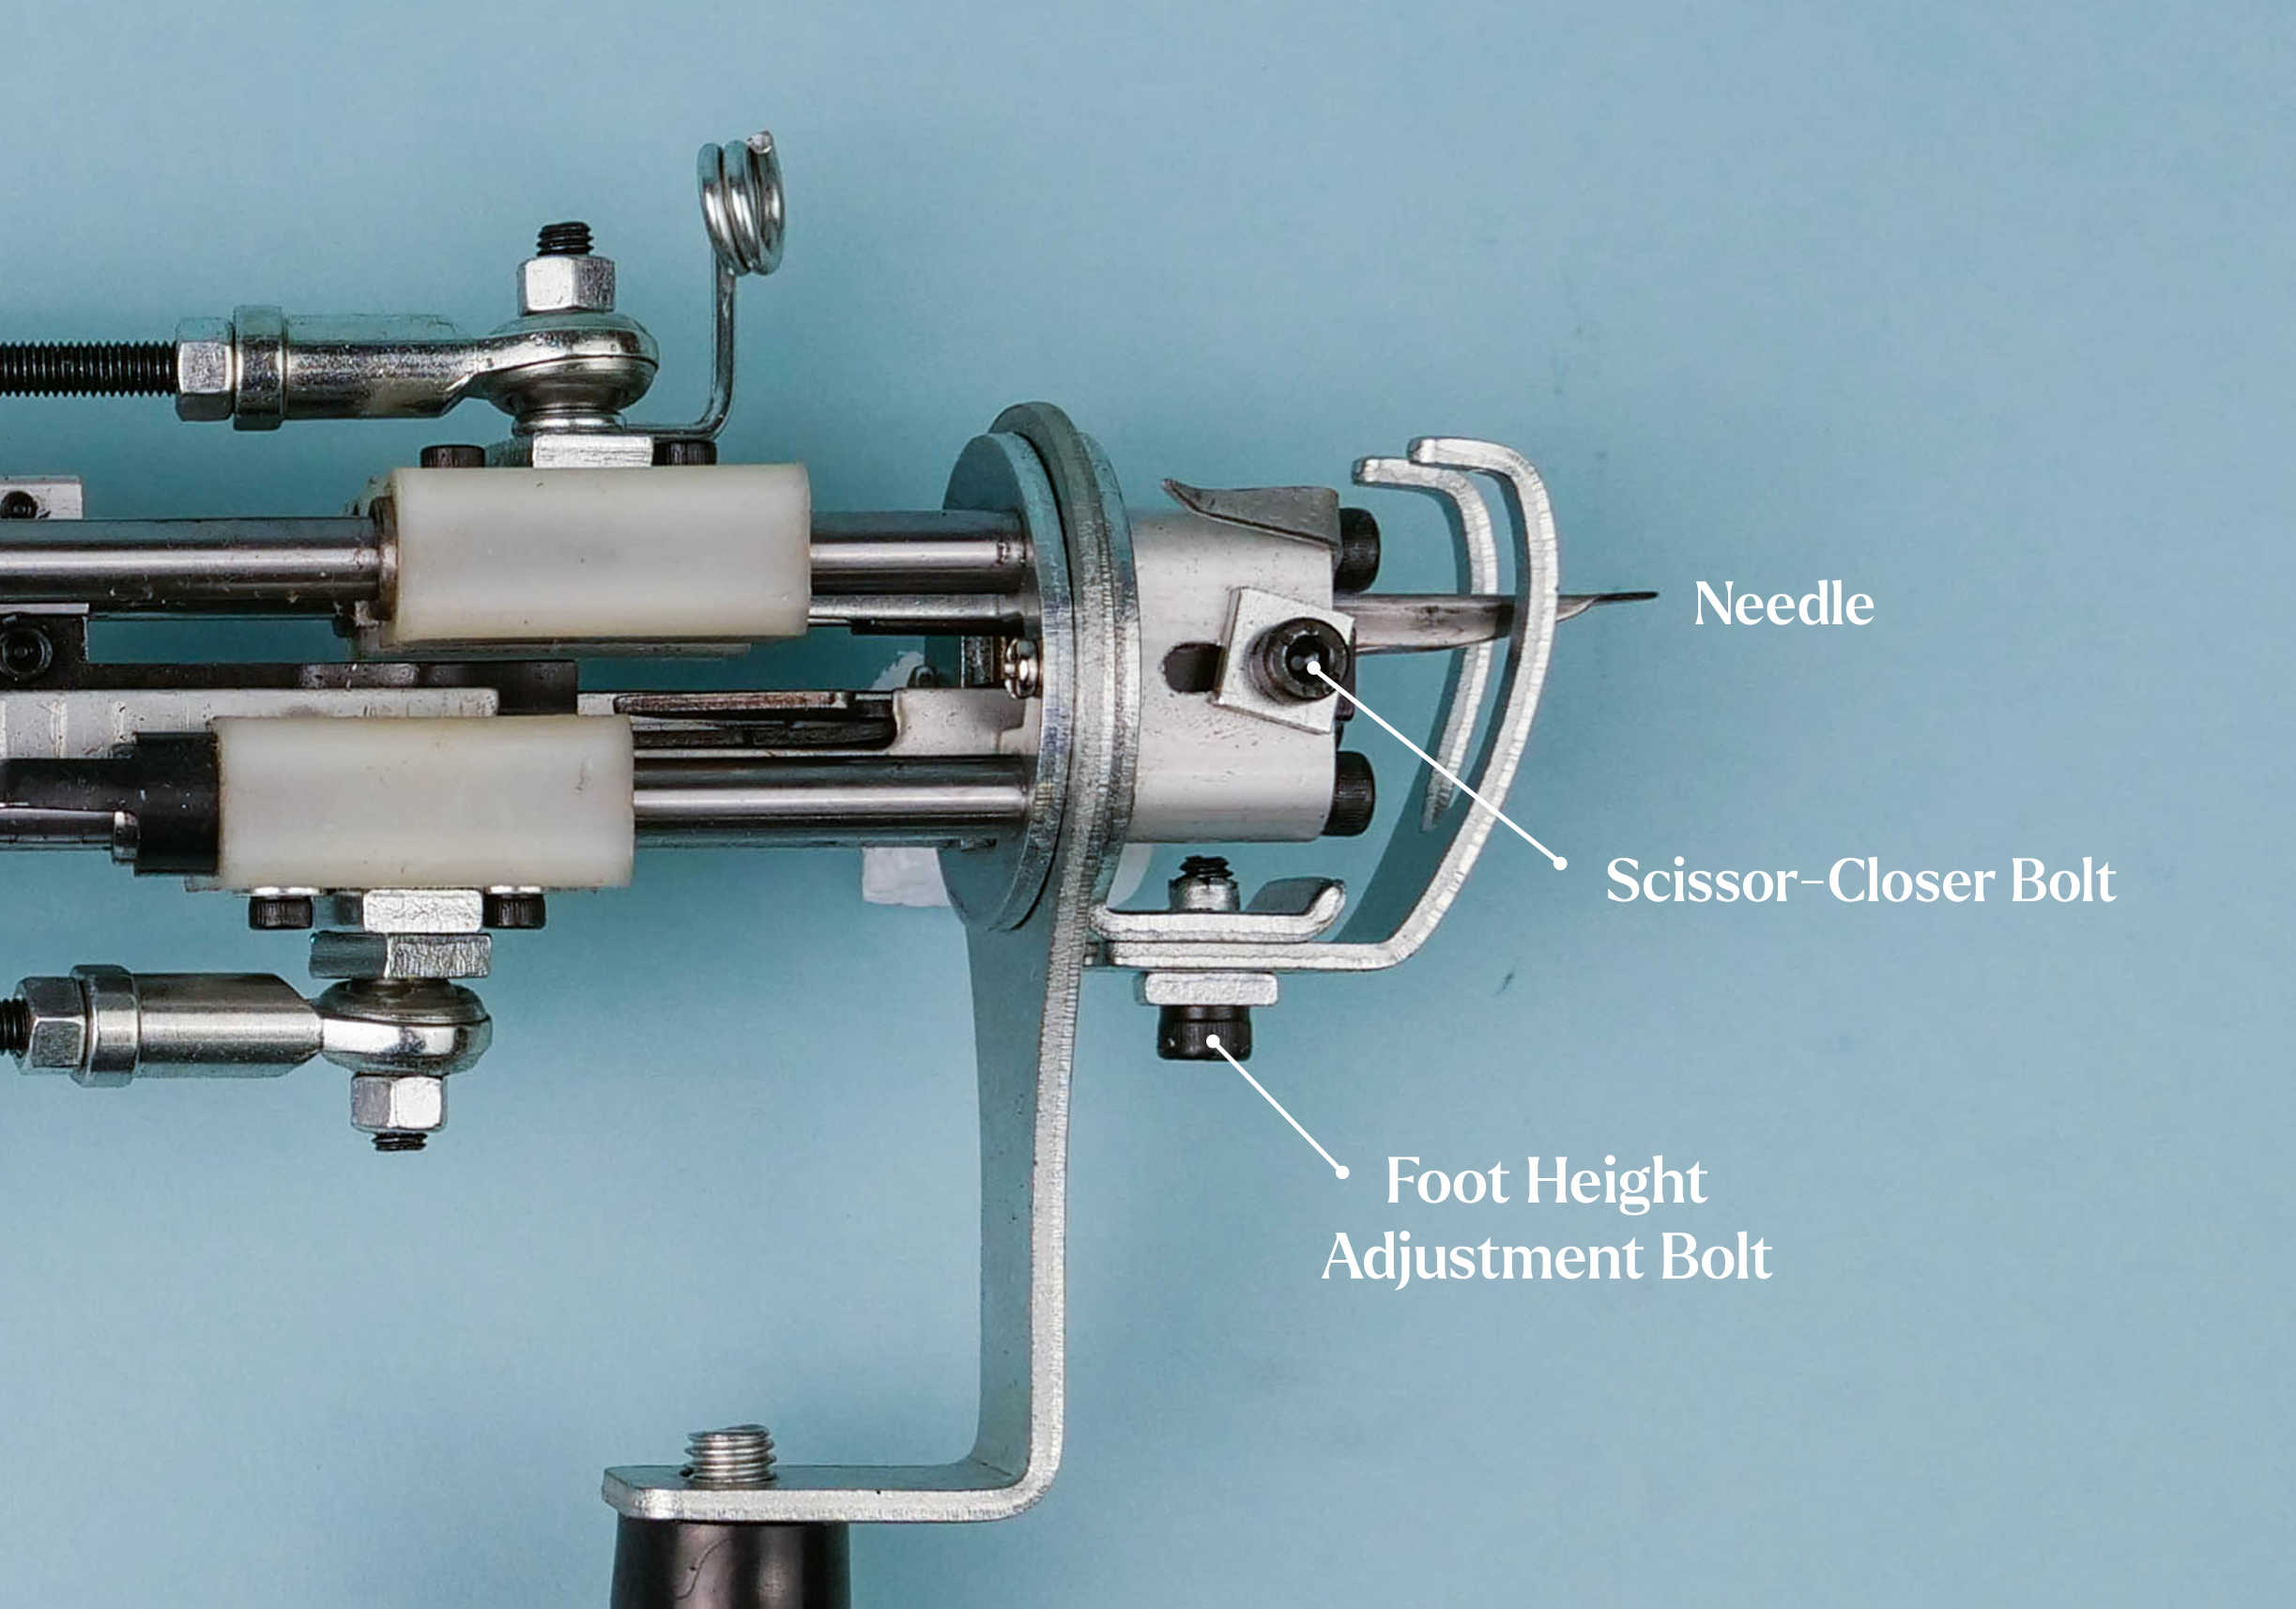
Step 3: Use an Allen wrench to loosen the foot height adjustment bolt, located on the underside of the foot. Adjust the foot by sliding it along the channel until it’s roughly lined up with the back edge of the needle hole. Before you tighten the foot back in place, make sure the needle is centered inside the foot. (Video: 8:45 - 10:35 mins.)
Step 4: Again, manually rotate the gear to ensure that the scissors open and close smoothly. If the scissors aren’t fully closing, you’ll need to make one more adjustment. Use the smallest Allen wrench provided to loosen the scissor-closer bolt, which is attached to an adjustable slotted piece called the scissor-closer that determines how the scissors close. Loosen the bolt, then make micro-adjustments to the position of the scissor-closer. The scissor-closer is in the correct position when the front of the piece is flush with the front of the body of the machine that houses the scissor-closer. (Video: 10:35 - 12:45 mins.)
Finally, check the gear again for several smooth rotations (and no loose bolts!) before you plug your machine in!